01Design
I modelled the whole structure before cutting anything — every post, beam, brace, rafter and bolt. The 26 × 20 ft slab and the Airstream itself are modelled in the assembly too, so I could check post locations and clearances around the trailer before committing to anything.
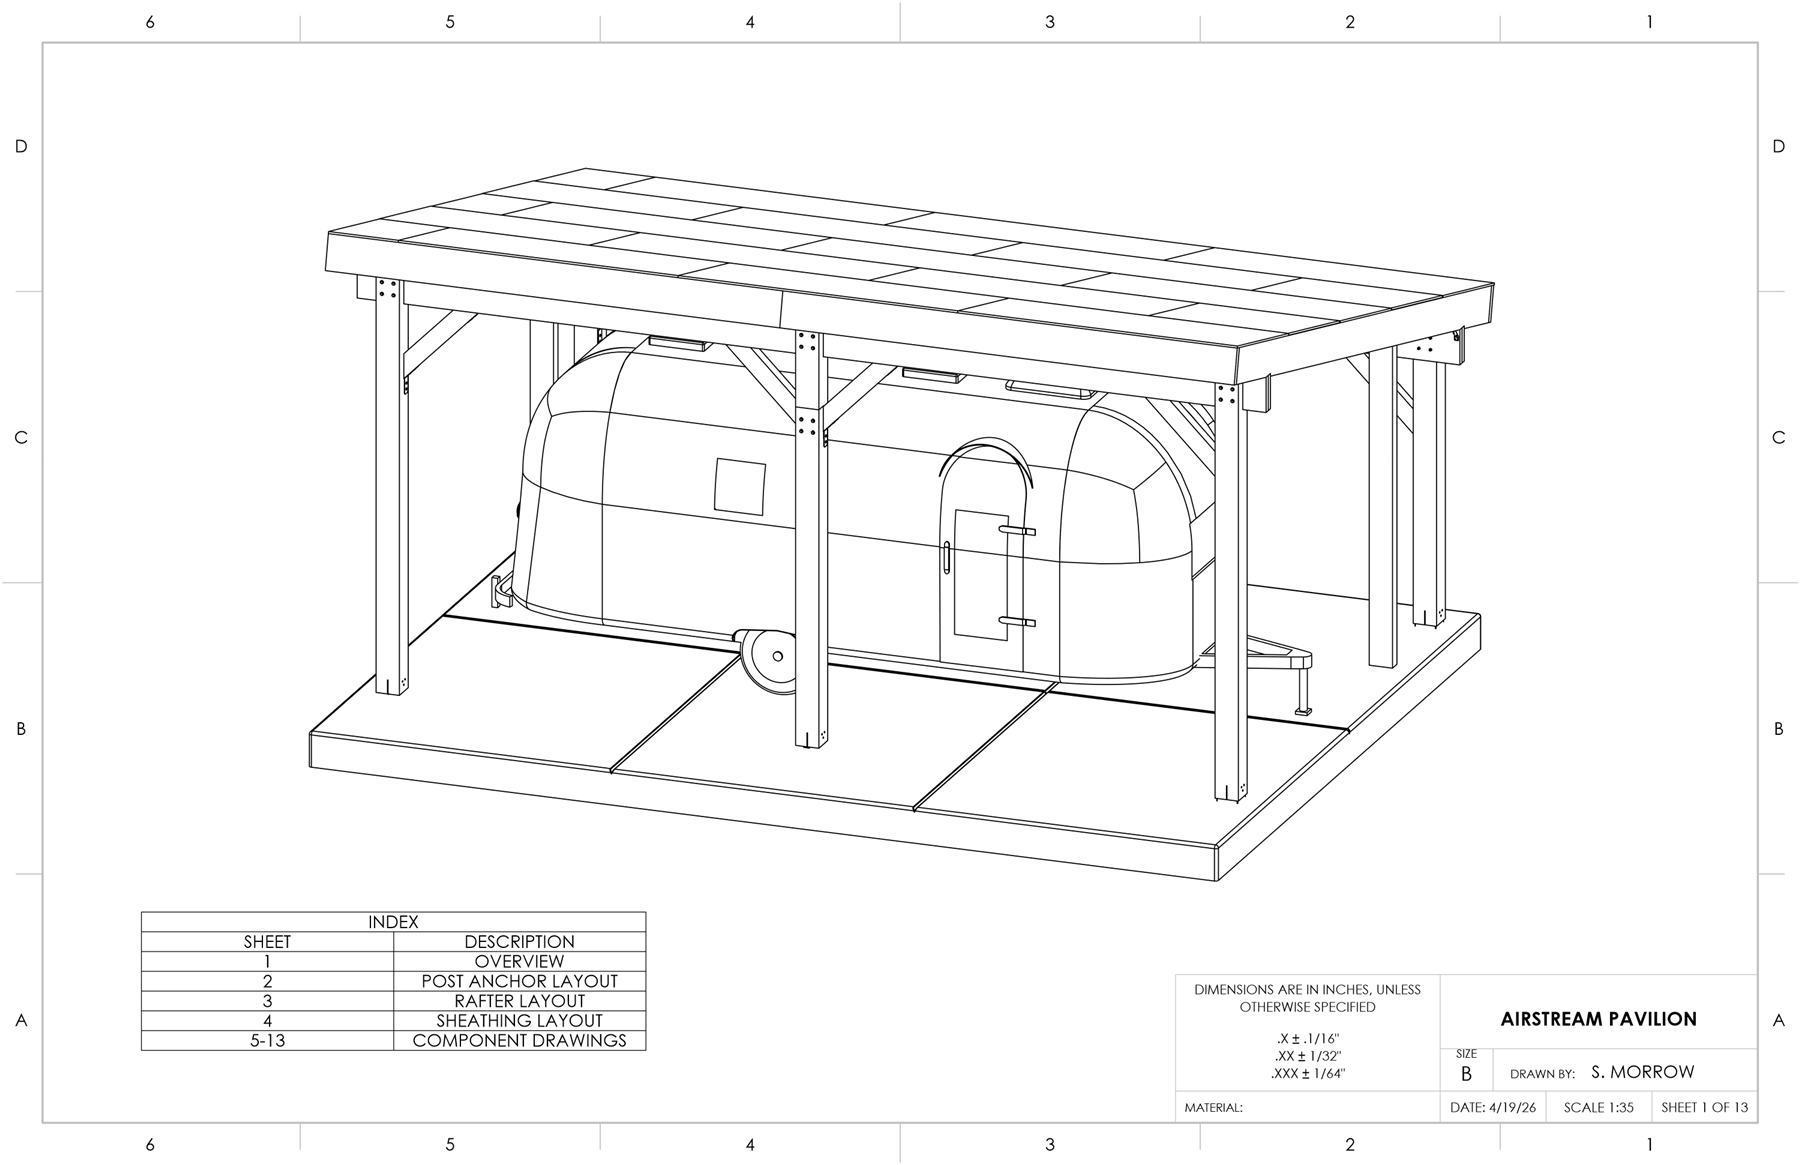
From the model I made a 13-sheet drawing set: an overview, layouts for the post anchors, rafters and roof sheathing, and a dimensioned drawing for every component.
The roof is a single slope — tall posts on one side and short posts on the other — laid out to carry a full array of solar panels.
02Post layout & anchors
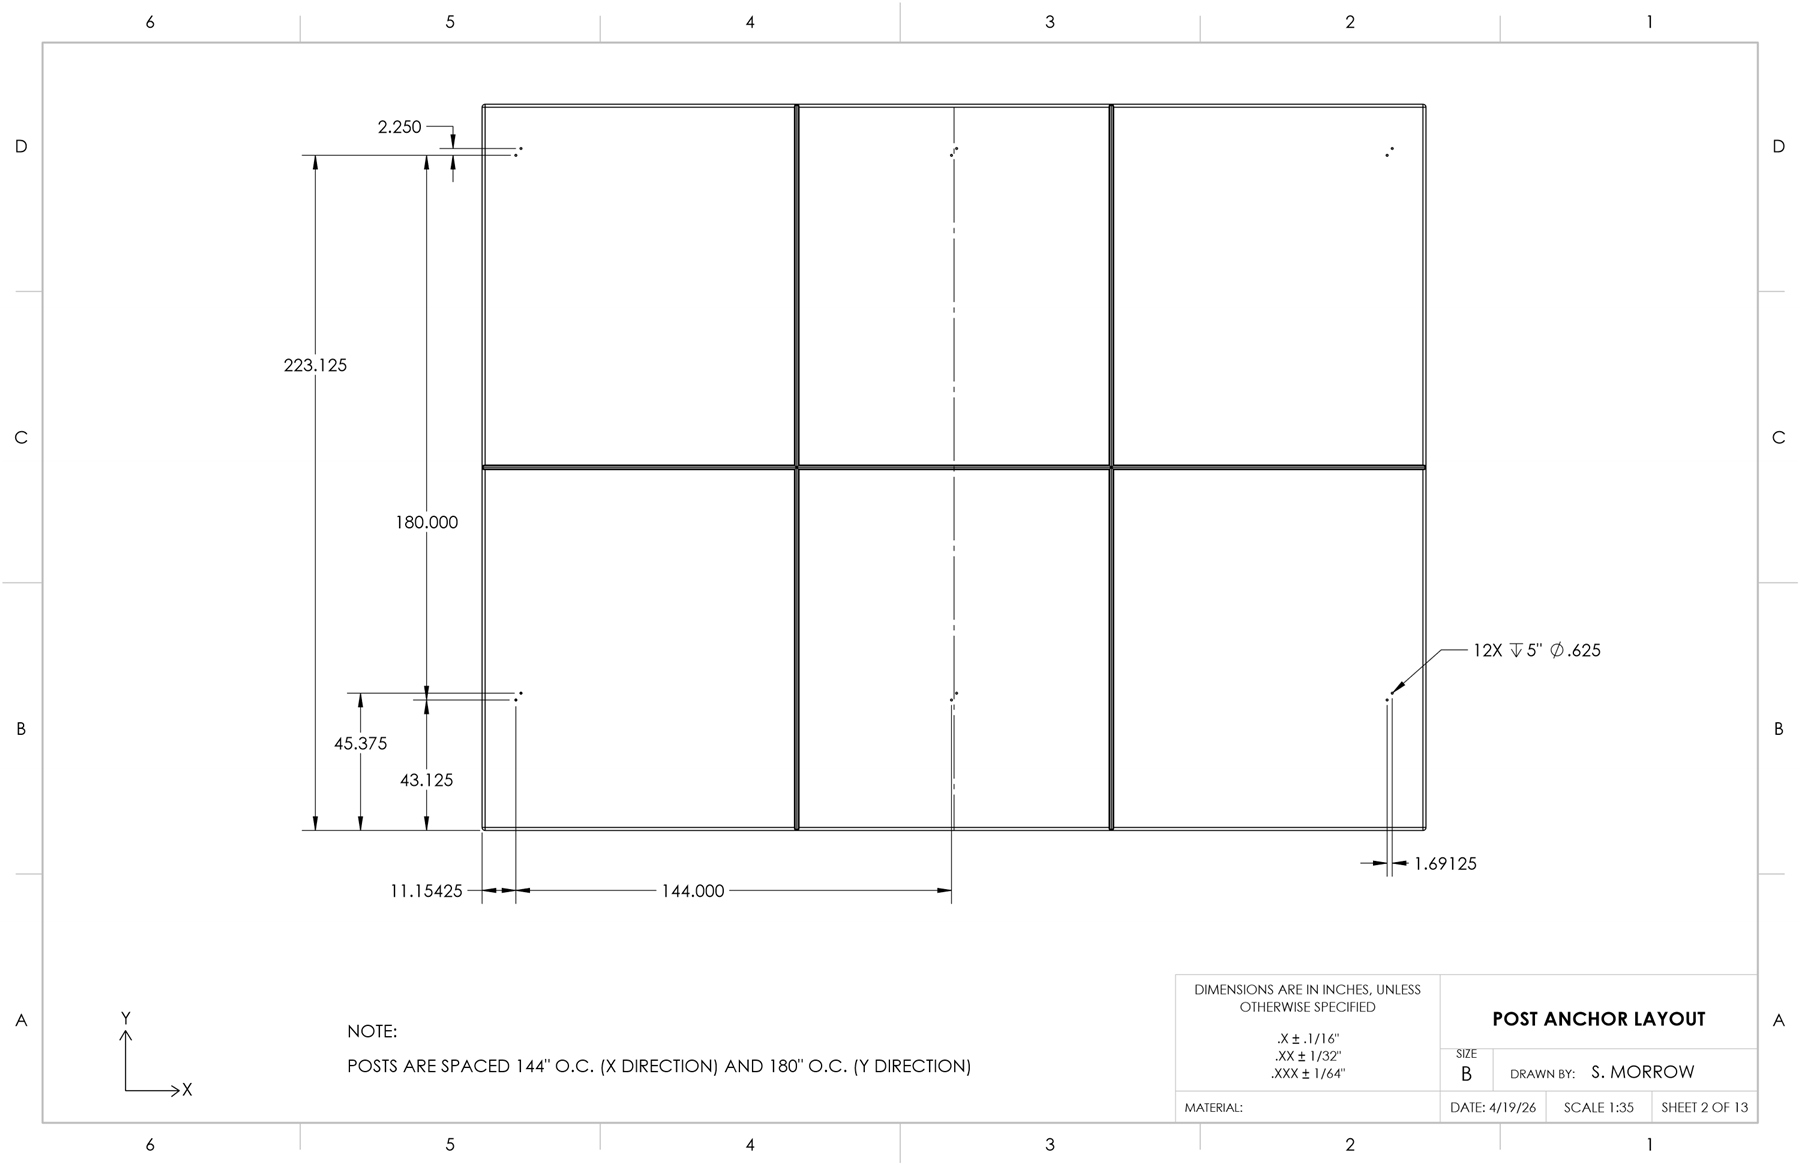
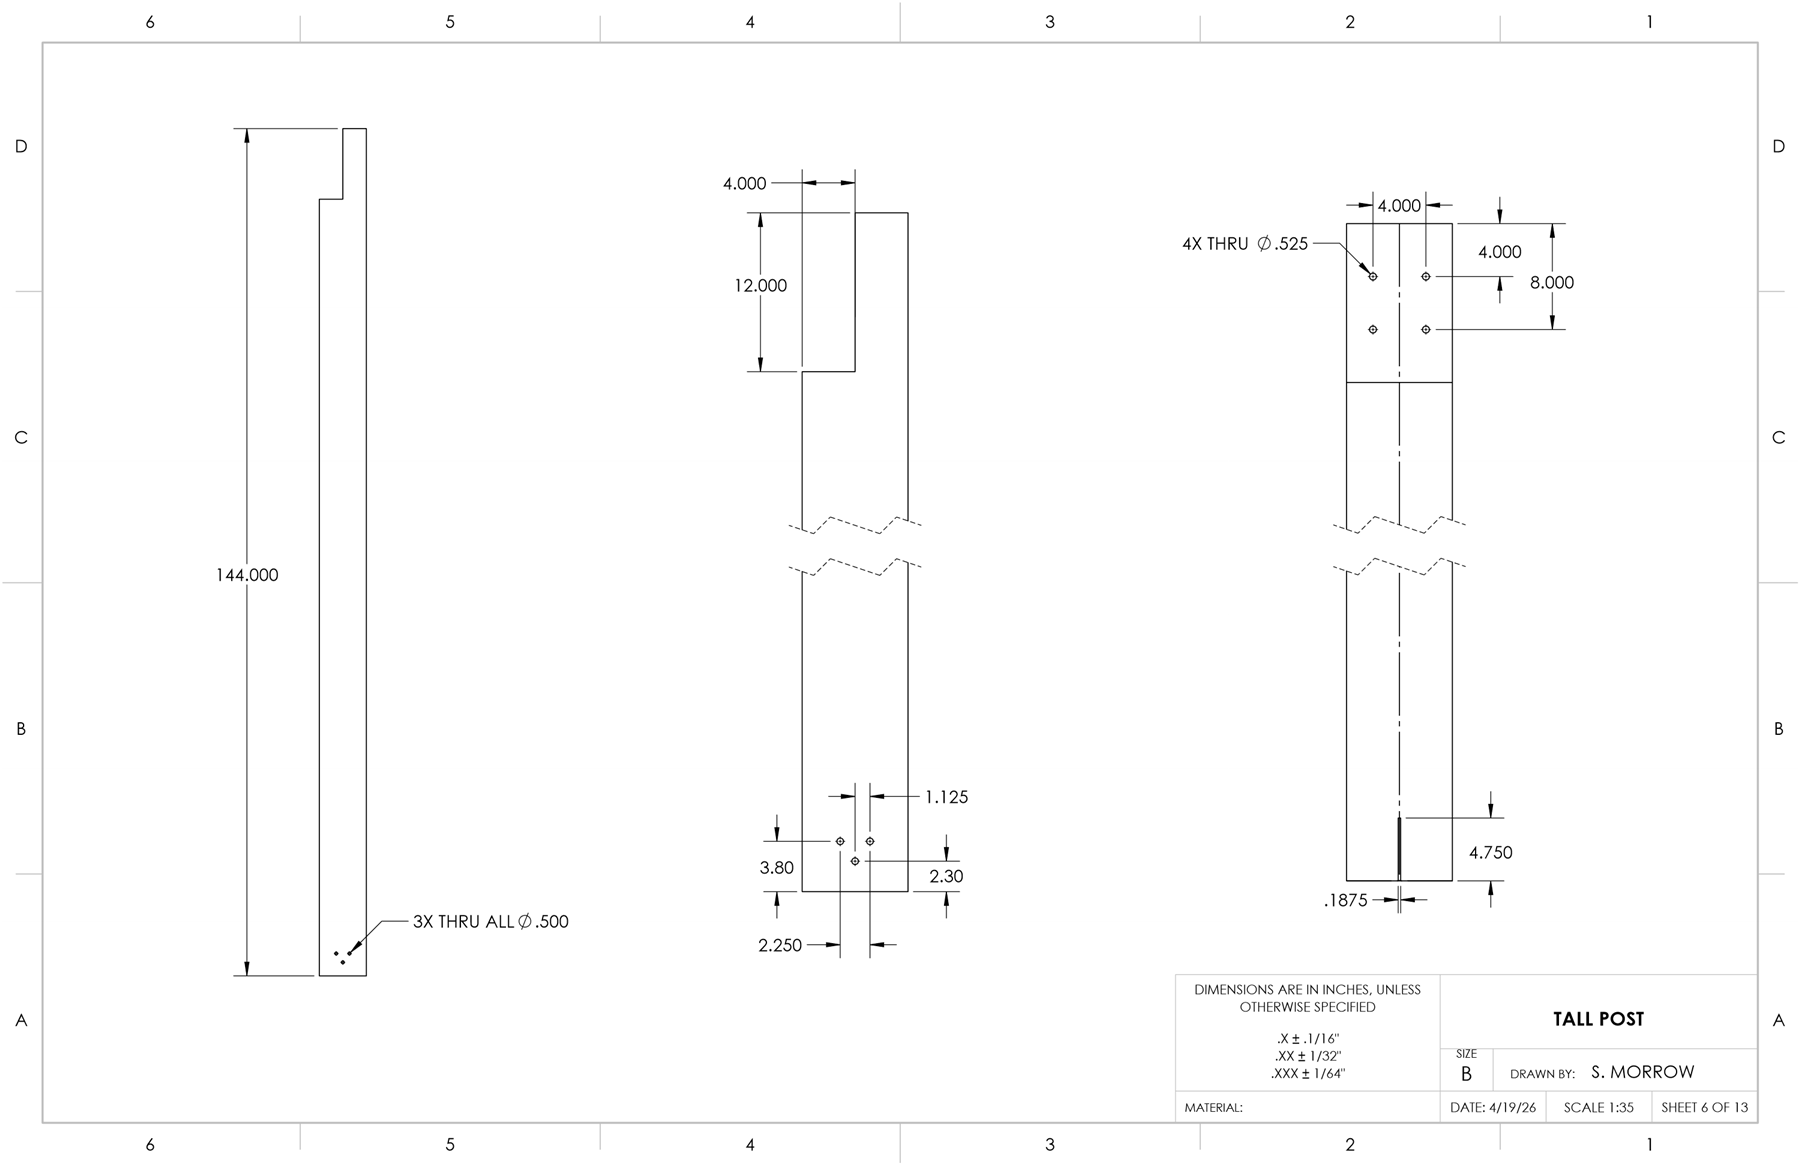
Six posts sit on a 144″ × 180″ grid (12 × 15 ft on center). Each one stands on a steel knife-plate anchor: a 3⁄16″ slot is kerfed 4¾″ up into the base of the post, the plate slides in, and three ½″ bolts pass through. Twelve ⅝″ holes, 5″ deep, were drilled into the slab for the anchors.
03Posts
The posts are 8×8s — 144″ tall on the high side and 102″ on the low side, which sets the roof slope. Each is notched 4″ × 12″ at the top to seat the beam, which is through-bolted with four ½″ bolts.
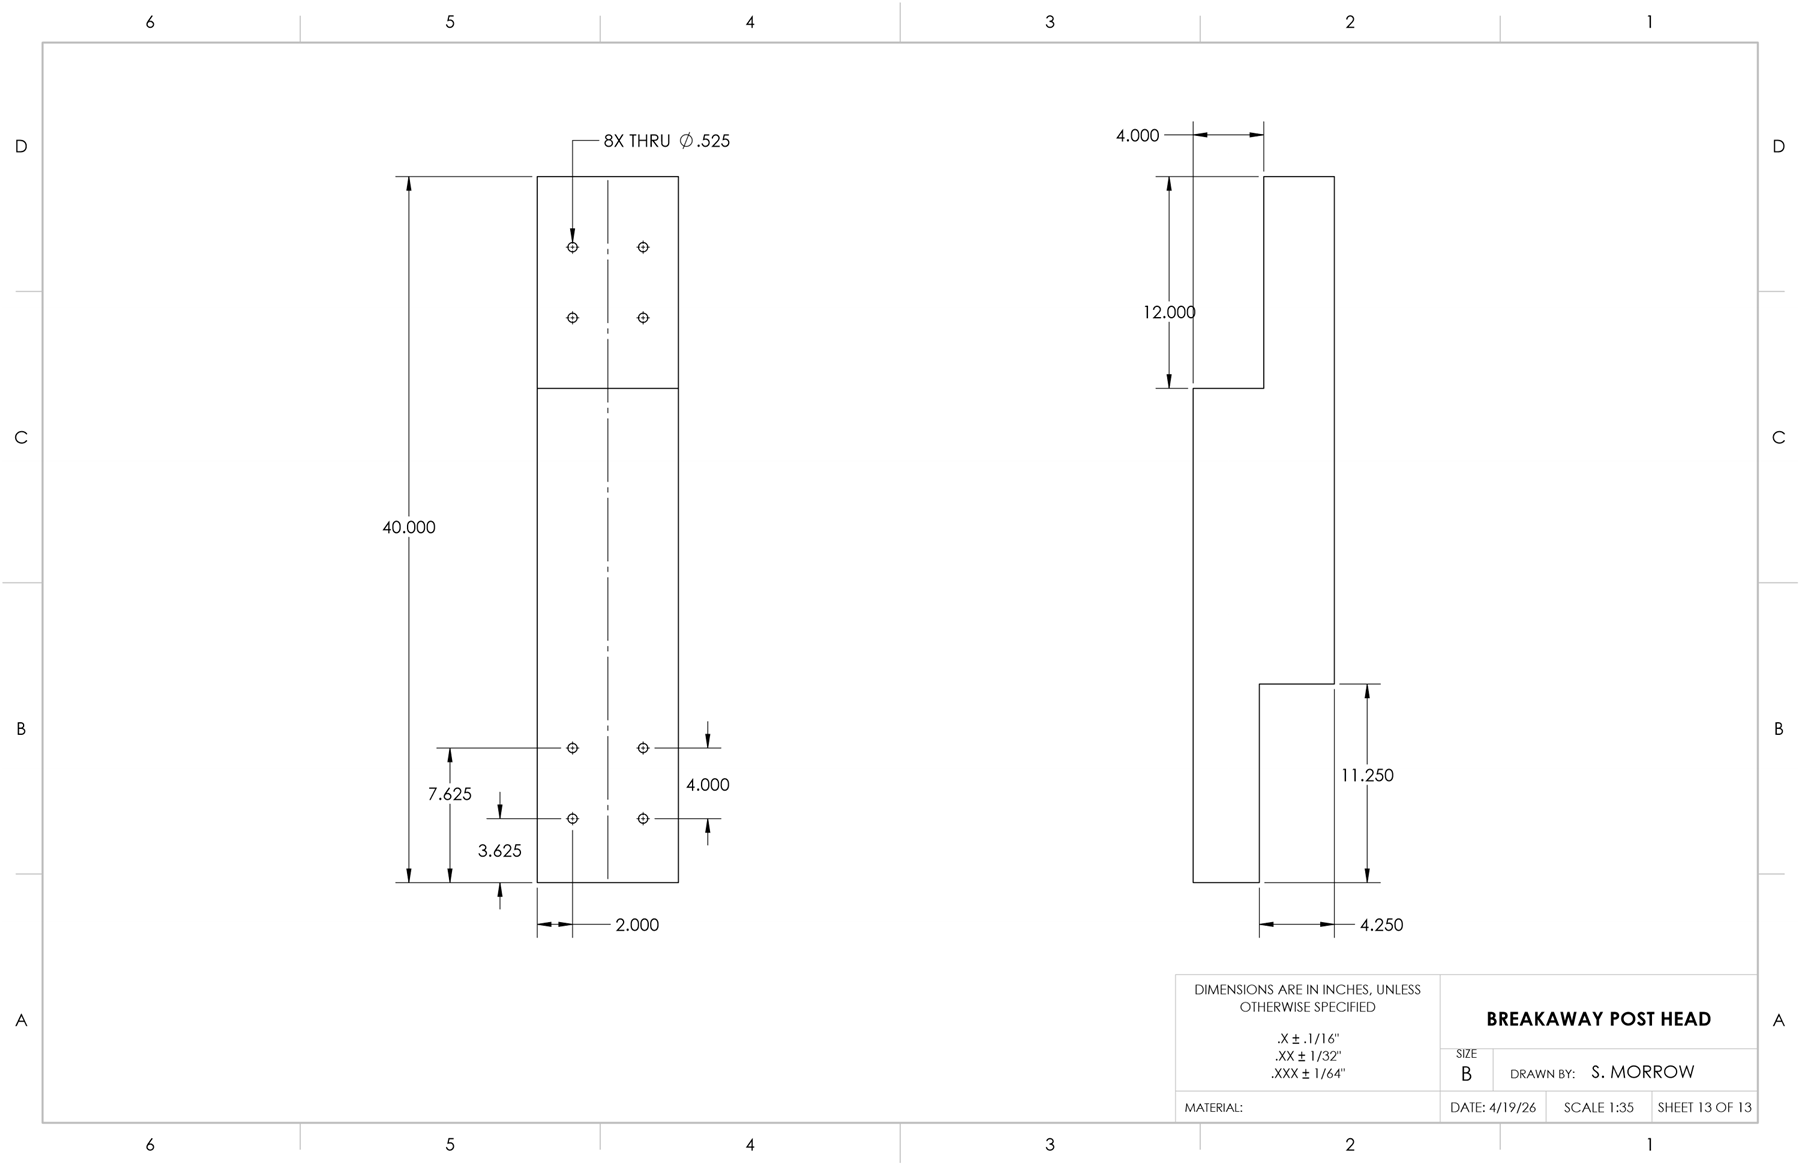
One post is built in two parts — a 115¼″ leg and a 40″ head joined with an 11¼″ half-lap and eight ½″ bolts — so it can be taken apart.
04Beams & bracing
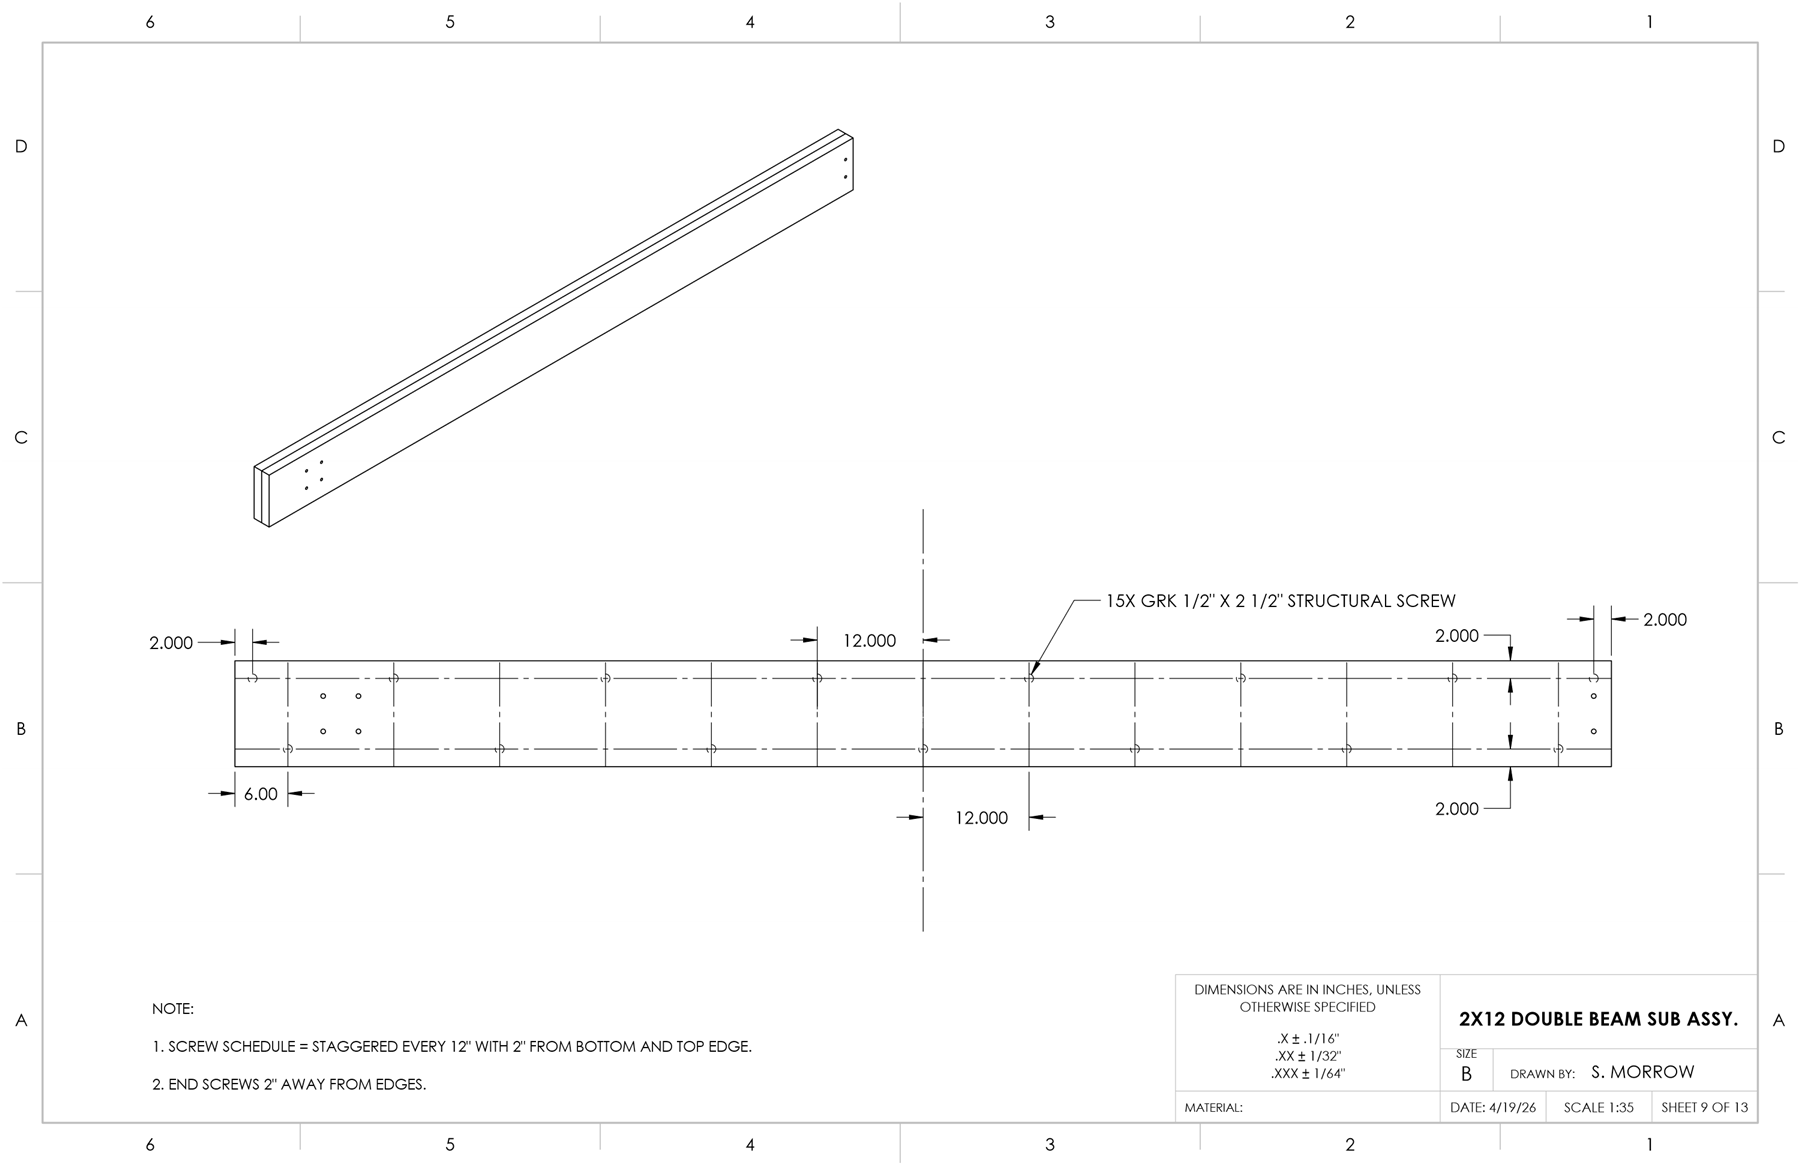
Each beam line is two 2×12s, 13 feet long, screwed together with fifteen GRK ½″ structural screws staggered every 12″. Two beam sections run end to end to span the full 26 feet. 4×6 knee braces, cut at 45°, tie the posts to the beams and stiffen the frame against racking; black steel brackets fasten each end.
05Rafters & sheathing
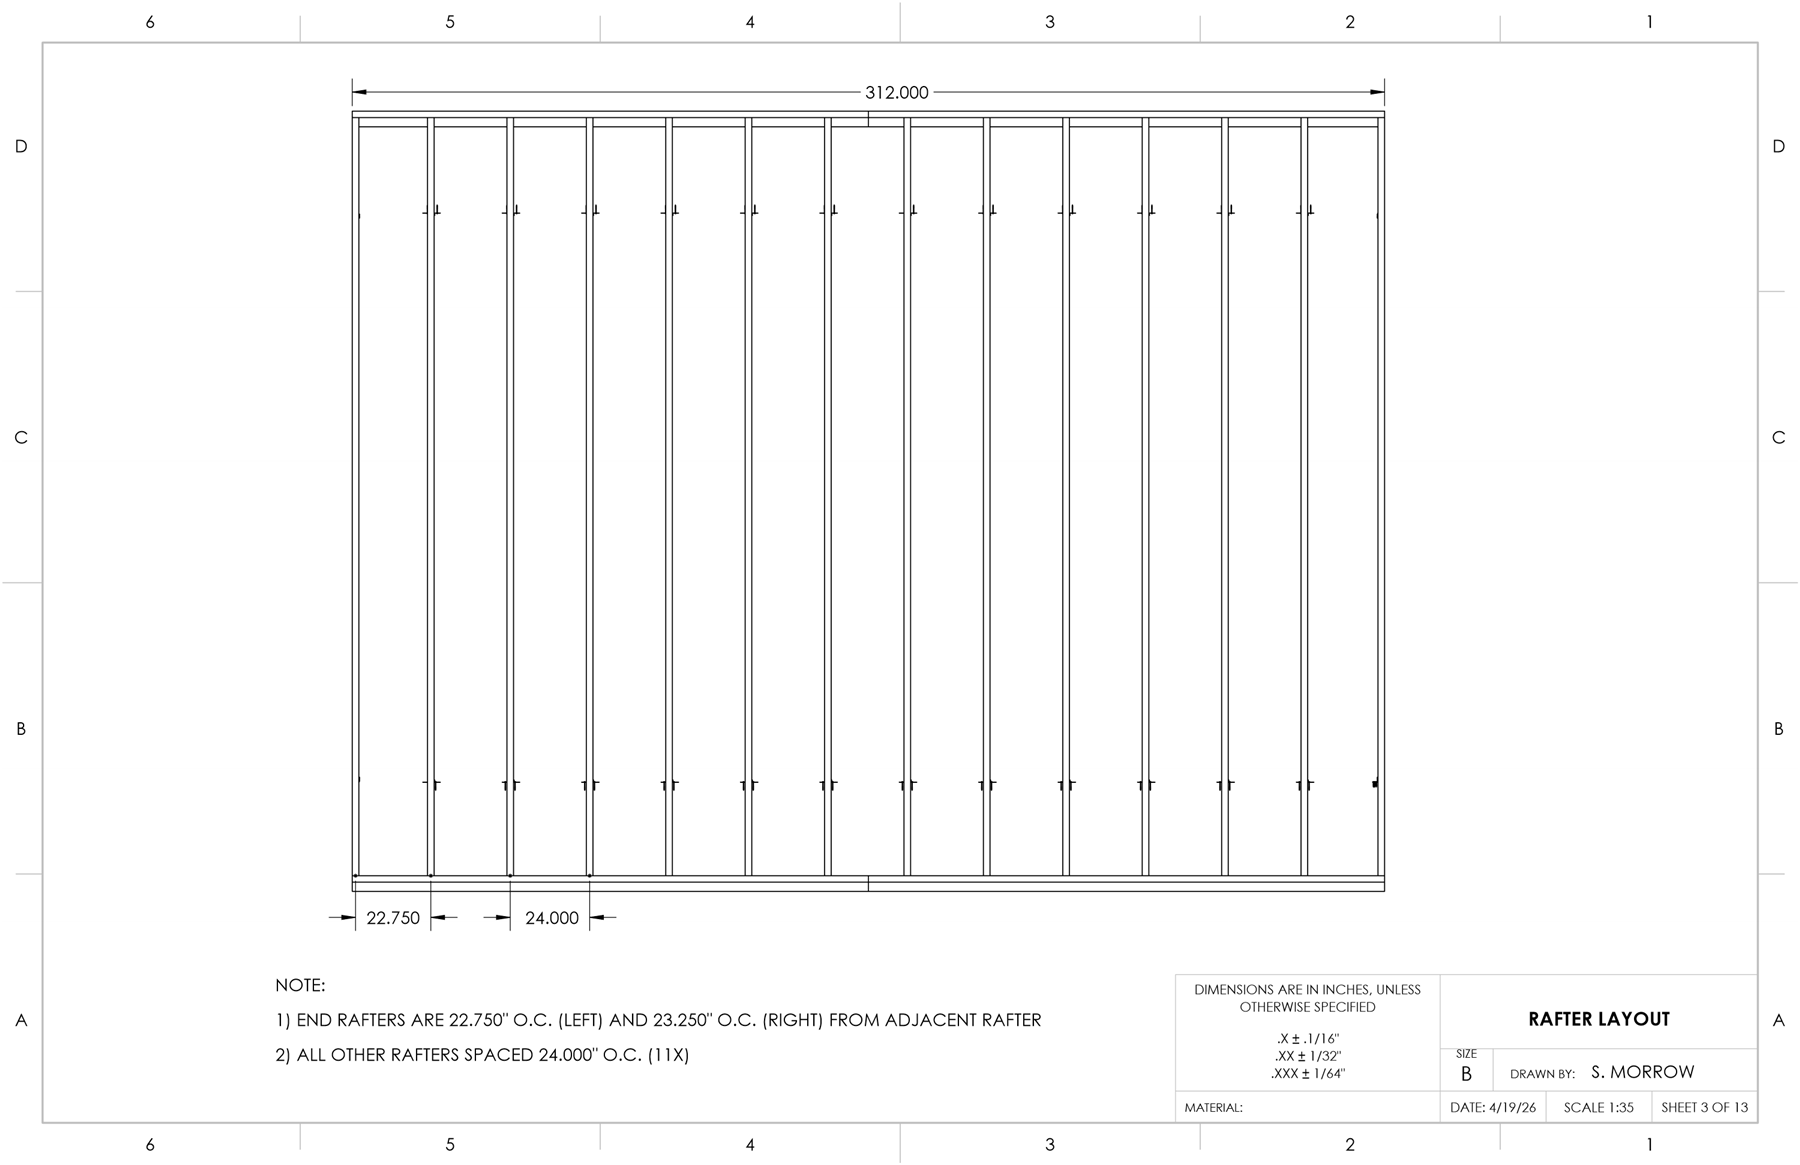
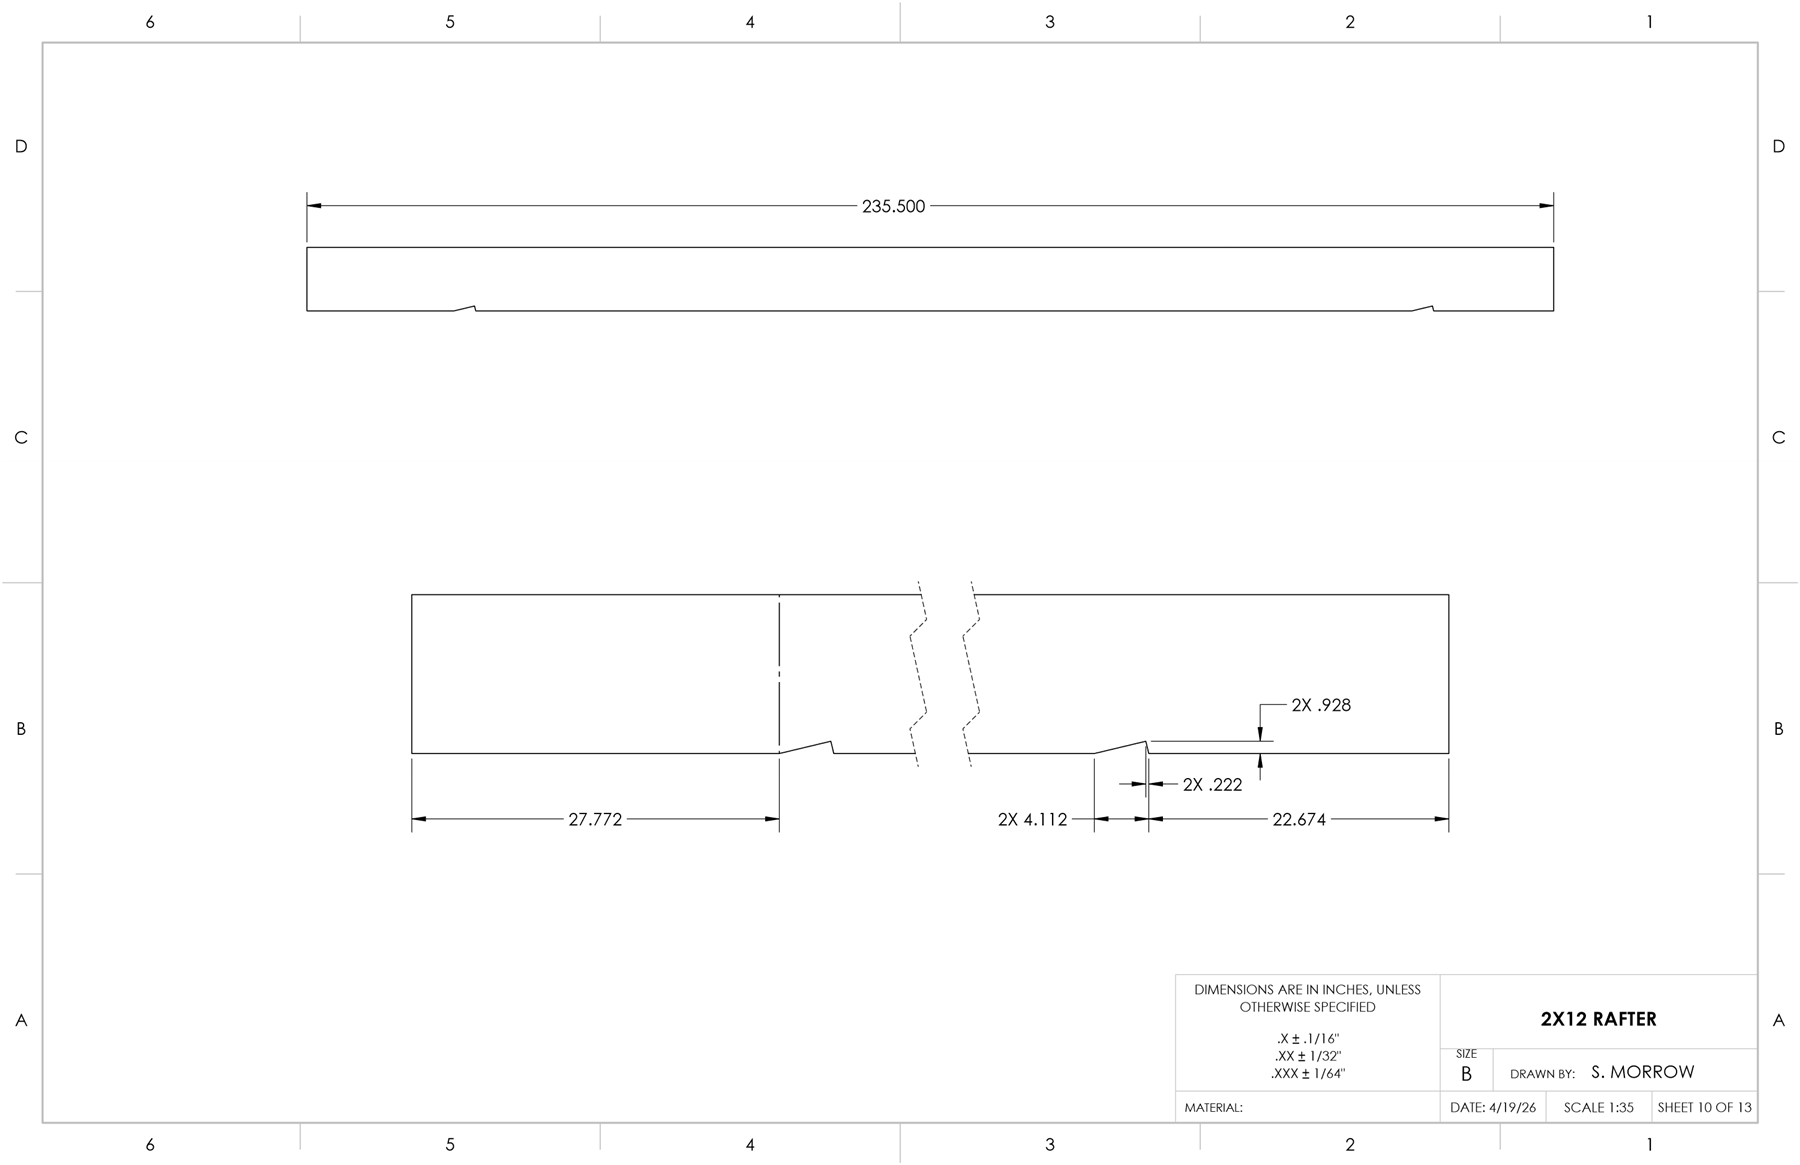
Fourteen 2×12 rafters, each 235½″ long, sit on the beams with birdsmouth notches cut to the roof pitch. They’re spaced 24″ on center, with 2×12 fascia boards along the ends.
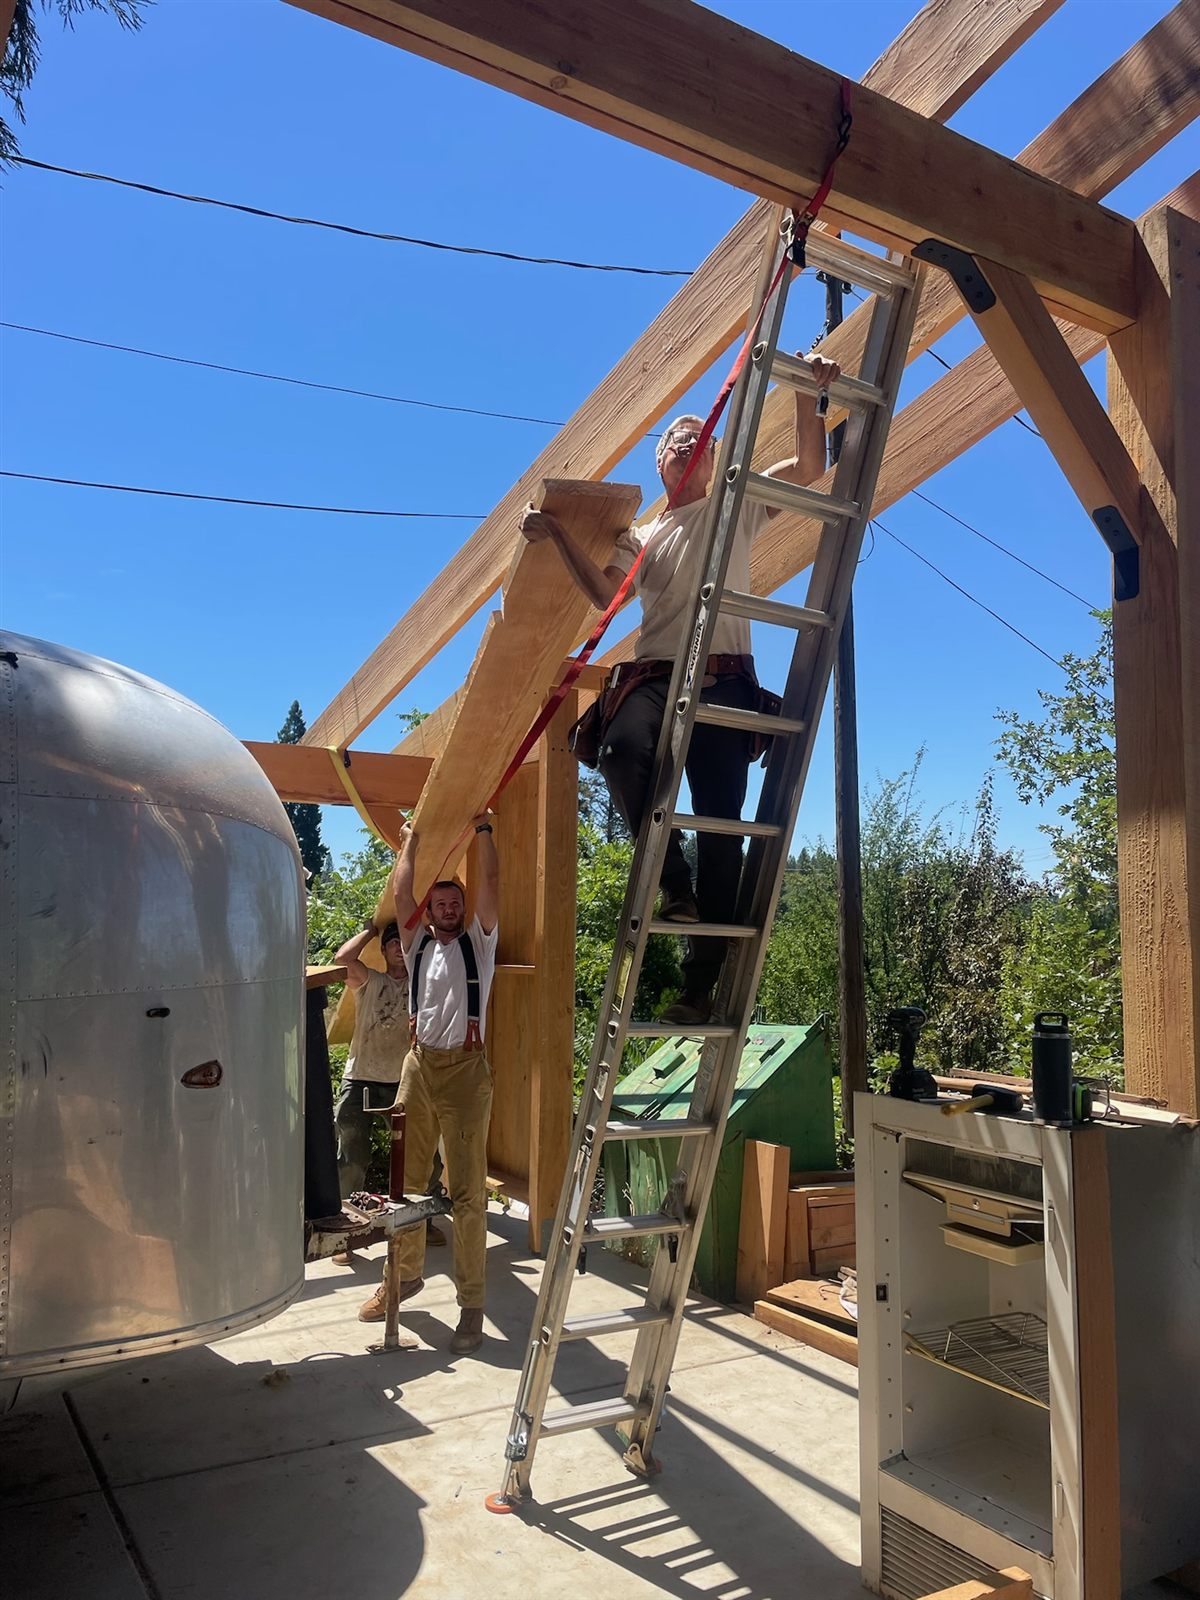
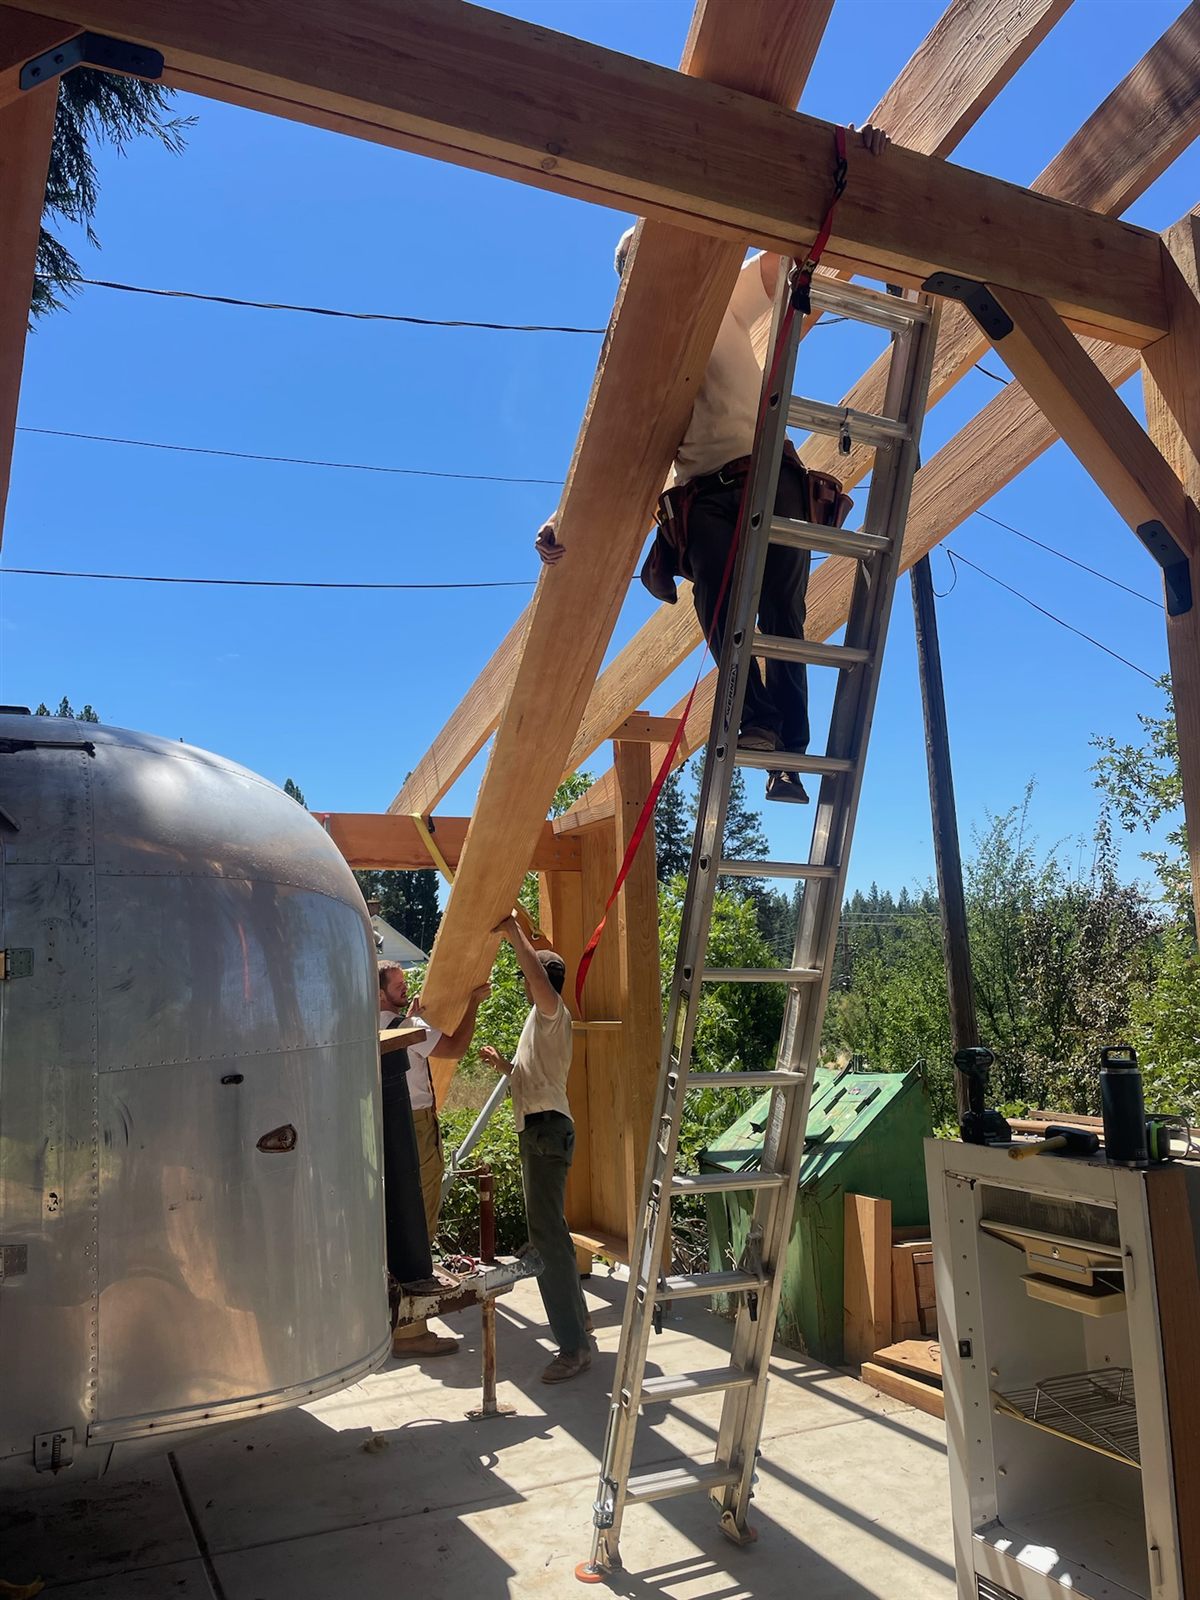
Raising them was a team job: one person up the ladder guiding each rafter onto the beams while two more pushed it up from below, with a ratchet strap to help hold it in place.
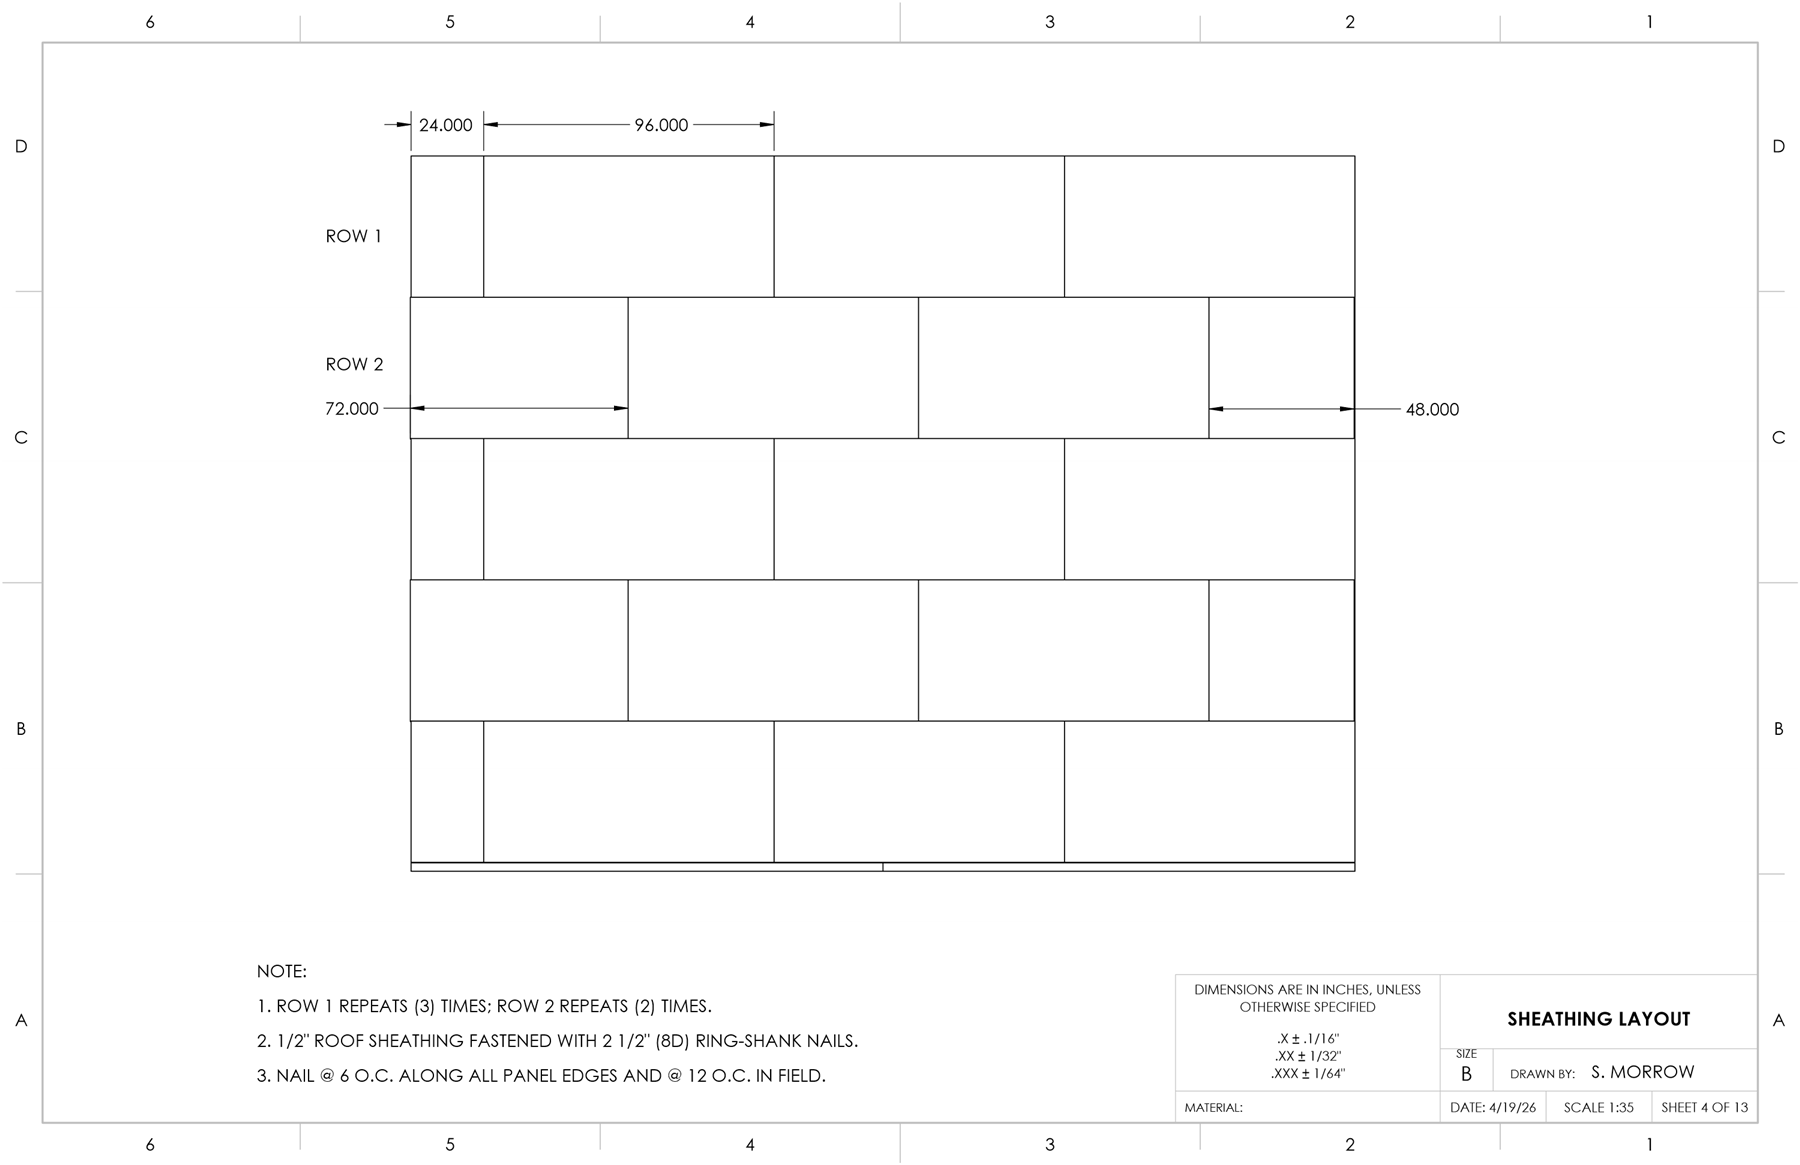
The roof deck is ½″ sheathing laid in staggered rows and fastened with 8d ring-shank nails — 6″ apart along every panel edge and 12″ in the field. The underside is left exposed.
06Finished
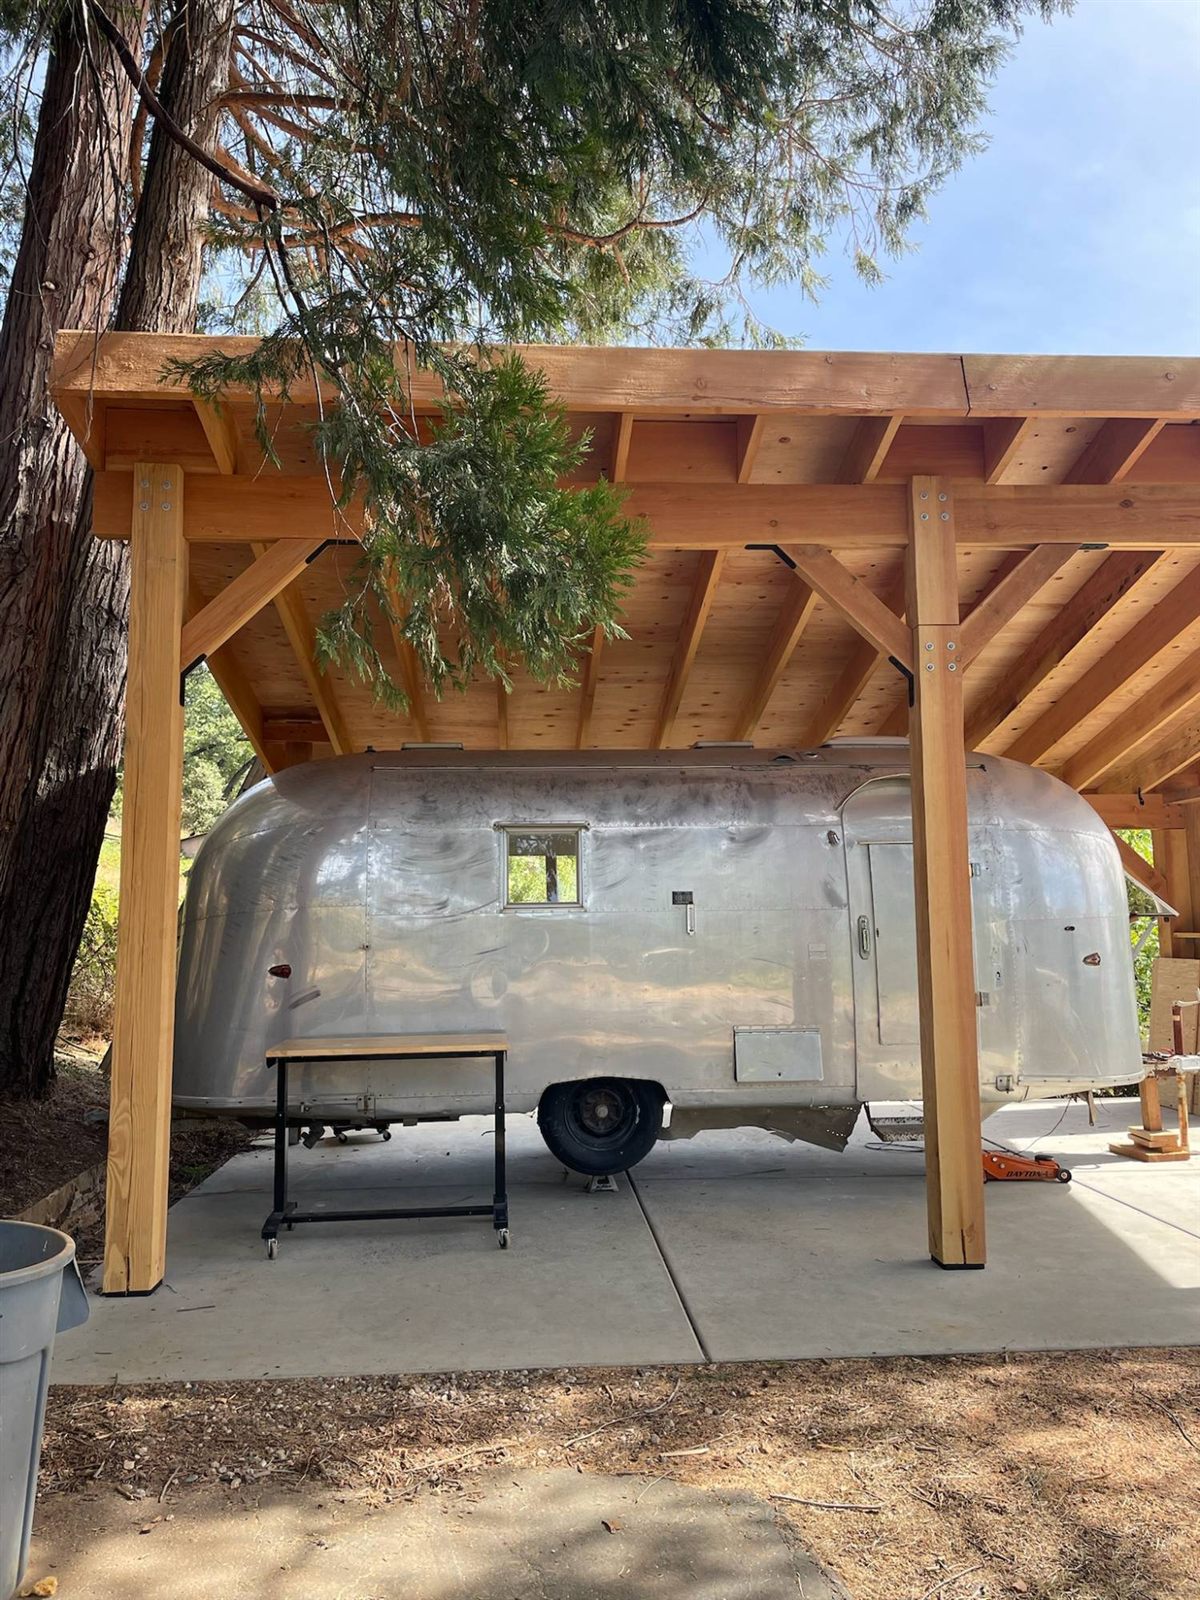
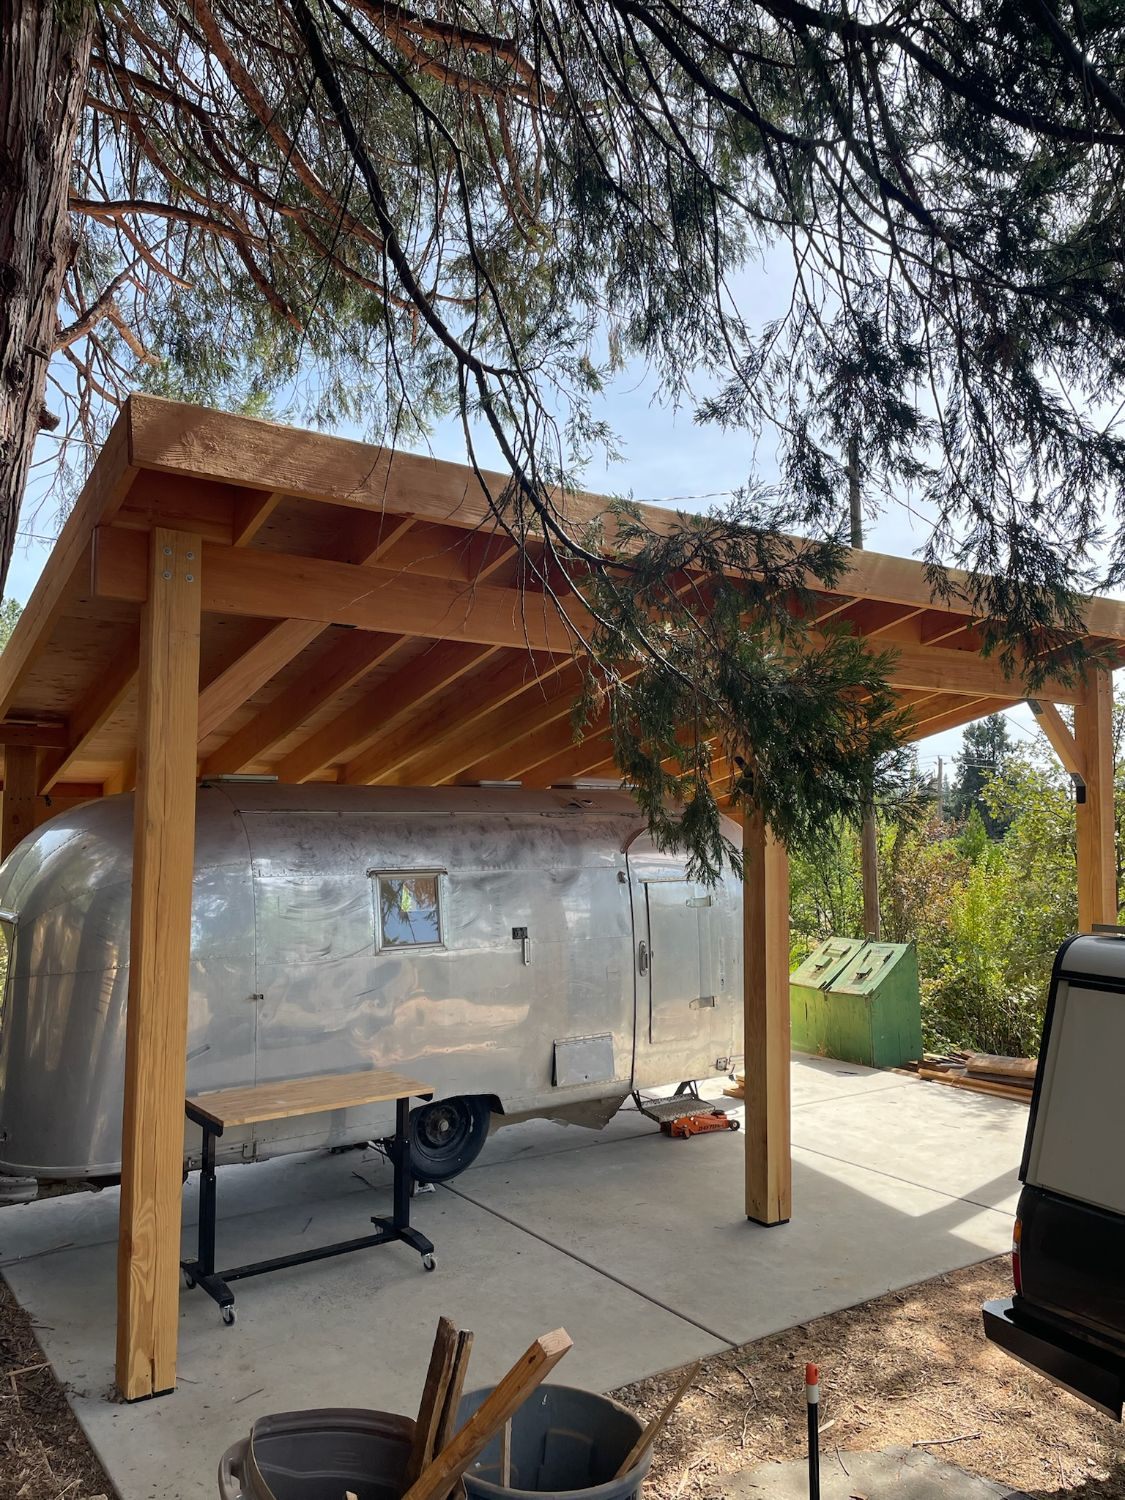
The finished pavilion, with the Airstream backed in underneath.